Delicious Pork Belly Kamado Joe Style
So who doesn’t love a good old roast pork belly. That succulent juicy goodness that a slow roast pork belly delivers…
Yesterday was my first crack at a pork belly on the Kamado Joe, gotta say I was a little hesitant as what is pork belly without a good crackle. Did the obligatory 99 thousand YouTube videos and read soo many posts on the subject. Decided to just give it a go on gut instinct. To my surprise, it worked pretty well. 🙂
My Method
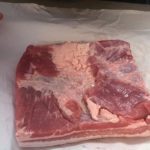
Pork Belly prep
- Morning of the cook (about 6 hrs before)
- Bathed the skin in Boiling water
- Dried with paper towels
- A liberal coating of ground Himalayan pink sea salt, a dash of a spicy garlic mix I found in the cupboard.
- Placed in the fridge uncovered.
- Just prior to cooking I dried the skin again and spent about 15 mins using a hair drier to get the skin as dry as possible.


Kamado prep
Nothing too fancy here, cleaned ash from the last cook, arranged the larger coals on the bottom and added a handful of new large pieces. A handful of hickory smoking chips added throughout the charcoal.

For the initial part of the cook, I added the Divide and Conquer system with 1/2 the deflector and 1/2 the grill rack on the Xrack on the lower position with the other grill rack above the deflector.
Was aiming for about 150C for the majority of the cook time.
Veggie Prep
Again subscribing to the KISS principle for the potatoes and pumpkin. For the spuds, it was a simple wash as I was leaving the skin on and whole. The pumpkin was just cut into largish chunks.
For the corn, wanted to experiment here a little. Decided to add some butter and garlic, wrap in baking paper and foil for the duration of the cook. Thought the garlic would impart a lovely subtle flavour and the butter would keep it moist and add that corn and buttery goodness.
Placed them all in a roasting pan with a dash of oil in the bottom and a good season of fresh cracked pepper and more pink Himalayan sea salt.
The cook
Total Duration: 4hrs
Kamado up to temp – ~150 C and held there for around 30 minutes prior to cook.
Initial 30 minutes, Pork belly only on lower rack skin down @ ~150C
After the initial 30 minutes, I moved the pork belly to the rack above the deflector
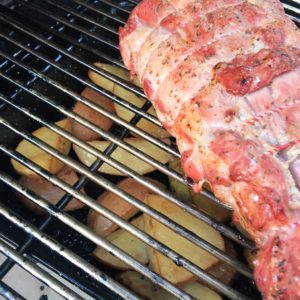
Re-set the lower rack to the upper rack position and added the pan veggies.
For the next 3 hrs, I aimed to keep the temp around 150-170 Deg C.

I had read in a number of posts that due to the awesome cooking abilities of the Joe in keeping moisture in that it may be beneficial to have a relatively higher volume of air moving through the Joe without getting it too hot. This is to try and drive “dry” air over the skin in an attempt to get that crackle going. With this in the back of my mind, I played with the vents to see what could be achieved. In the end, for most of the cook I was wide open on the top vent and about 20mm on the bottom vent, this seemed the most stable and achieved the desired temps.
At around the 3hr 15 minutes, I tested the veggies and they were perfect, took them out and placed them in the oven to keep them warm (pre-warmed oven to ~100 C and turned off). Once the veggies were off, I re-set the rack back to the lower position and cracked open the bottom vent, I was aiming to raise the temp ~200-225 C. Placed the pork belly skin down on the lower rack while it came up to temp, let it cook there for 5-10 minutes then put the pork back up to the upper rack and let it cook at the higher temp for the next 20 minutes.
Pulled the pork belly off after 4hrs, wasn’t 100 % happy with the crackle, there was some and it looked good but not as much as I was after. Cracked out the hairdryer and hit the skin a close range for a couple of minutes, improved it a bit but still under my expectations.

Overall rating
- Pork: 10/10
- Crackle: 6/10
- Veggies: 10/10
Improvements for next cook
Crackle, crackle, crackle. Need to experiment here and see what works best. Apply some of the experience from the interweb and see what happens.
Joe on !!!


