If your dough seems too elastic (wants to snap back after you have stretched it), let it rest for 10 more minutes and then stretch it again. I have had some occasional instances where I have had to come back to it twice!
After you have shaped your crust, transfer it to a wooden pizza peel that has been dusted with semolina flour (don’t use corn meal.) add your toppings. I recommend not going too heavy on the toppings until you have a good feel for how your oven will cook these pizzas. Once your pizza is on the peel and topped, give the peel a little jiggle shake and make sure your pizza is going to slide easily off the peel. If your pizza does not slide easily at this point, you may need to take it off and add some additional semolina flour to the peel. You don’t want to find out that your pizza is stuck to the peel while you are trying to launch it into the oven! If you are unsure of this technique, there is no shame in building your pizza on a circle of parchment paper. This does make transferring the pizza really easy and there is no negative impact on the pizza cook from using the parchment paper.
Launch your pizza onto your preheated pizza stone in the oven. The cook will take anywhere between 8 and 12 minutes in most cases depending on your oven. Once your pizza is cooked to your liking, use your peel to retrieve the pizza. At this point, a metal peel can make it easier to retrieve the pizza since they are thinner and will slide under the pizza more easily than a thicker peel.
Let your pizza rest for a few minutes, slice it and enjoy your completely made from scratch pizza!
Now…
I told you I would show you three dough recipes in this post. The recipes for these doughs are all the same except for the quantity of yeast being used. The next two recipes are identical. We will be looking at a 24-hour dough and a 72-hour dough. TIME is an ingredient that turns a good pizza dough into a fantastic pizza dough! Slower fermentation of the dough with less yeast and more time builds a lot richer flavour.
The 24-Hour Dough:
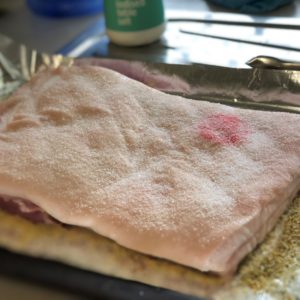
Use the same recipe and use 1 gram of active dry yeast. One gram is approximately 1/4 plus 1/8 tsp. 1/4 teaspoon would probably work just as well. Use the same technique as the quick dough. When you place the dough in the greased mixing bowl for the ‘bulk rise,’ you will simply leave that mixing bowl on your counter at room temperature for 24 hours. Then you will resume the original recipe/technique by dividing the dough, shaping 2 or 3 dough balls, let those rise for 30 minutes or so covered, and then make and cook your pizza. You will see a definite improvement in the overall flavour of this dough.
The 72-Hour Dough:
This recipe/technique is the same as the 24-hour dough with one more change. When you divide the dough and shape it into individual dough balls, you will put each ball in an oiled plastic container with a lid and put it in the refrigerator for 48 hours. You will remove it from the fridge about 2 hours before you are ready to shape it so it can return to near room temperature. Once again, you should see a wonderful improvement in the flavour of the longer fermentation period!
Don’t be intimidated by the 24- and 72-hour dough recipes. They do not take any longer in terms of hands-on time than the 2-hour quick dough.
Going one more step towards phenomenal flavour:
The 24- and 72-hour dough can be elevated even higher in the flavour spectrum by using sourdough starter in place of the active dry yeast in the recipe. To convert the recipe to a sourdough version, reduce the water and flour in the recipe by 50 grams each. Replace that with 100 grams of an active sourdough starter that has been fed within the last 12 to 14 hours. Your sourdough starter should be a 100% hydration starter which means equal parts flour and water by weight.
Experimenting with Flavor:
You can change the flavour of pizza dough by experimenting with a few things. One of the first experiments you might like to try is playing with some different blends of flour. Try replacing 5 to 10 percent of your flour with whole wheat flour. That brings an earthiness to the pizza crust that is quite delicious. Try small amounts of rye flour as well. Durum and semolina flour in pizza dough also work well in small amounts.
You can also try additions of garlic and onion powder in small quantities. These quantities might be as small as 1 or 2 teaspoons for the entire batch of dough. You could also add some Italian seasoning blend to the dough.
You can also vary the amounts and types of oil and sugar. You can use molasses or honey instead of table sugar. You could use a flavoured oil of some sort instead of extra virgin olive oil. There are lots of possibilities that you can try to make a pizza dough that is truly your own!
Wanna learn more? 

I learned about everything I know so far from these books along with trial and error in the kitchen.
The Elements of Pizza – Ken Forkish
The Pizza Bible – Tony Gemignani
These two books not only contain a LOT of great technique information, they both are full of great recipes.
Some useful equipment:
If you are cooking on a kamado grill, this pizza stone is your best bet. It’s a perfect size (15″ diameter) for an 18″ kamado grill and it’s practically indestructible unless you drop it. I have used and abused mine beyond belief. They also have a 20″ version for the 24″ grills.
Pizzacraft Thermabond Pizza Stone
This stone is awesome and works great in your oven or on a larger kamado grill.
If you don’t like the way bubbles form on artisan style pizzas, a dough docker will help with that. You can alternatively use a fork.